
Component
As we have seen in the architecture of an angular, component is the basic building block of the UI.
A whole angular application is divided into multiple components.
Here we will create a new ProductsComponent, which will show the list of products on screen.
Syntax to create a new component in project use below command of Angular CLI in terminal.
ng g component <component-name>
or
ng g c <component-name>
so to create a new ProductsComponent, execute below command in electronic-shop application.
ng g c products
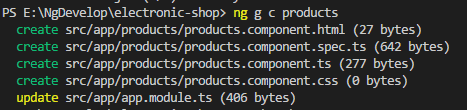
As you can see above, this command will generate one folder called products and in that folder it will generate four files, product.component.html, products.component.spec.ts, products.component.ts, products.component.css.
This will also add ProductsComponent in the declaration part of the containing module. Here there is not any other module available, so it will update the root module called app.module.ts
- Note
You can also create above files manually and add that component declaration in the containing module, but this is a very tedious task.
So we will use Angular CLI to create each component.
Now, the component is created but you are still not able to see it on screen.
To display this component on screen we need to add the selector of that component on app.component.html
<div class="container-fluid">
  <app-products>Loading</app-products>
</div>
Add the above code in app.component.html, In this code <app-products> is the selector of ProductsComponent. You can see this selector in products.component.ts file
<app-products>Loading</app-products> will show ProductsComponent on screen. Loading message will display until the ProductsComponent is loaded on the screen
Now you will able to see the products component on screen.
- Note
container-fluid is the bootstrap class, and all other components will be part of this division.
A good practice when writing Angular code is to try to isolate the data structures we are using from the component code.
If all the data was stored inside components as plain objects it would be hard to manage objects.
To solve this issue, We will create a class called Product, and add all the properties related to a product in that class.
This class is what we call a Domain Model, it’s just a plain class which we will use to store data and functions.
Create a Product domain model using below code in the separate product.ts file.
We will create all the domain models in separate folder called models . So we will create models folder in src/app.
export class Product {
    id: number;
    title: string;
    modelName: string;
    color: string;
    productType: string;
    brand: string;
    price: number;

    constructor() {

    }
}
Generally, In an angular web application, we will get the data using the web service call. But for the initial developing purpose, we will create a class called MockData in separate file called mock-product-data.ts.
For that We will create separate mock-data folder in src/app, and then create mock-product-data.ts
MockData class will give us a dummy products list, as shown below
import { Product } from '../models/product';

export class MockData {

    public static Products: Product[] = [
        {
            'id': 11,
            'title': 'OPPO F5 Youth (Gold, 32 GB)',
            'modelName': 'F5 Youth',
            'color': 'Gold',
            'productType': 'Mobile',
            'brand': 'OPPO',
            'price': 16990
        },
        {
            'id': 12,
            'title': 'Dell Inspiron 7000',
            'modelName': 'Inspiron',
            'color': 'Gray',
            'productType': 'Laptop',
            'brand': 'DELL',
            'price': 59990
        }
    ];

}
We have created Product domain model and mock data of product list. Now, we will use this list in the ProductsComponent.
We will create a products array in the ProductsComponent, and assign it with the mock data returned by MockData class.
import { MockData } from './../mock-data/mock-product-data';
import { Component, OnInit } from '@angular/core';
import { Product } from '../models/product';

@Component({
  selector: 'app-products',
  templateUrl: './products.component.html',
  styleUrls: ['./products.component.css']
})
export class ProductsComponent implements OnInit {

  products: Product[] = [];

  constructor() {
    this.products = MockData.Products;
  }

  ngOnInit() {
  }

}
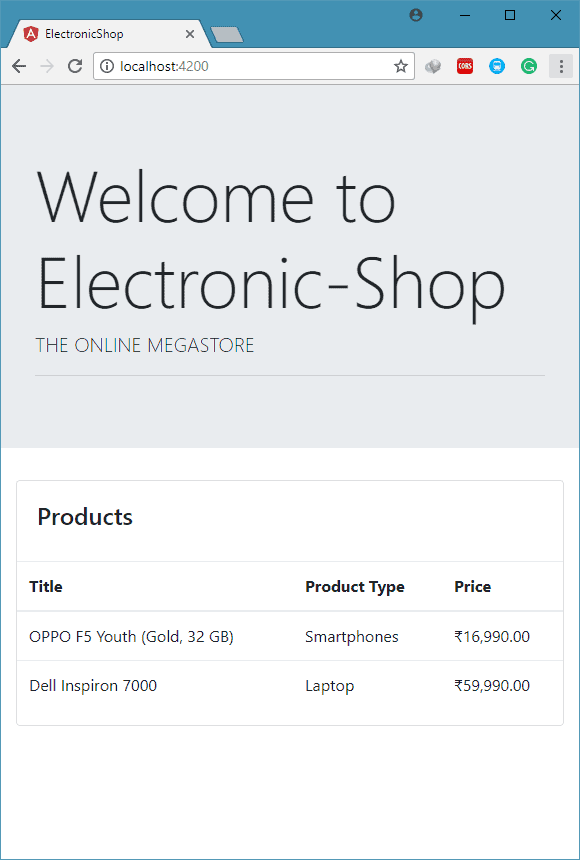
Now to display this products array on the screen, we will use the table. I have used the Bootstrap card component to make a better user interface.
Add below code in the products.component.html file
<div class="card">
  <div class="card-body">
    <h4 class="card-title">Products</h4>
  </div>

  <table class="table">
    <thead>
      <tr>
        <th>Title</th>
        <th>Product Type</th>
        <th>Price</th>
      </tr>
    </thead>
    <tbody>
      <tr *ngFor="let product of products">
        <td scope="row">{{product.title}}</td>
        <td>{{product.productType}}</td>
        <td>{{product.price | currency : 'INR'}}</td>
      </tr>
    </tbody>
  </table>

</div>
The highlighted code will display the product object on the screen.
*ngFor is the structural directive, which we have seen in the Angular Basics
{{product.title}} is the interpolation which is used display component property on screen.
In {{product.price | currency: ’INR’}}, I have used currency pipe to display Indian Rupee Symbol.
<div class="jumbotron jumbotron-fluid">
  <div class="container">
    <h1 class="display-3">Welcome to Electronic-Shop</h1>
    <p class="lead">THE ONLINE MEGASTORE</p>
    <hr class="my-2">
  </div>
</div>
<div class="container-fluid">
  <app-products>Loading</app-products>
</div>
export class Product {
id: number;
title: string;
modelName: string;
color: string;
productType: string;
brand: string;
price: number;
constructor() {
}
}import { Product } from '../models/product';
export class MockData {
public static Products: Product[] = [
{
'id': 11,
'title': 'OPPO F5 Youth (Gold, 32 GB)',
'modelName': 'F5 Youth',
'color': 'Gold',
'productType': 'Mobile',
'brand': 'OPPO',
'price': 16990
},
{
'id': 12,
'title': 'Dell Inspiron 7000',
'modelName': 'Inspiron',
'color': 'Gray',
'productType': 'Laptop',
'brand': 'DELL',
'price': 59990
}
];
}
<div class="card">
  <div class="card-body">
    <h4 class="card-title">Products</h4>
  </div>

  <table class="table">
    <thead>
      <tr>
        <th>Title</th>
        <th>Product Type</th>
        <th>Price</th>
      </tr>
    </thead>
    <tbody>
      <tr *ngFor="let product of products">
        <td scope="row">{{product.title}}</td>
        <td>{{product.productType}}</td>
        <td>{{product.price | currency : 'INR'}}</td>
      </tr>
    </tbody>
  </table>

</div>
import { MockData } from './../mock-data/mock-product-data';
import { Component, OnInit } from '@angular/core';
import { Product } from '../models/product';
@Component({
selector: 'app-products',
templateUrl: './products.component.html',
styleUrls: ['./products.component.css']
})
export class ProductsComponent implements OnInit {
products: Product[] = [];
constructor() {
this.products = MockData.Products;
}
ngOnInit() {
}
} 
In this chapter, We have displayed the Product List on the screen by using following steps.
- We have created a new component called ProductsComponent.
- after that, we have created one Product domain model to separate product object with the component.
- We have created a MockData class to get the dummy product list for developing purpose.
- Once we got the data, we have updated the ProductsComponent and template of this component.