
Template Driven Forms are the simplest way to create a form in Angular Application. We need not have to create FormGroup and FormControl inside the Component.
Angular provides built-in directives to bind the HTML form with the model object of Component. using these directives Angular creates FormGroup and FormControl internally internally us.
In this previous chapter, We have created Add Product form using model-driven forms approach.
In this chapter, We will create same Add Product form using template driven forms approach. So that you can understand the difference between both types of forms.
Create a new component called AddProductTemplateComponent using below command on terminal.
Here, I have used the ‘Template’ in component name, to differentiate it as a Template Driven Form.
ng g c add-product-template

Now to display this component of screen add selector of AddProductTemplateComponent in app.component.html. as shown below
<div class="jumbotron jumbotron-fluid">
  <div class="container">
    <h1 class="display-3">Welcome to Electronic-Shop</h1>
    <p class="lead">THE ONLINE MEGASTORE</p>
    <hr class="my-2">
  </div>
</div>
<div class="container-fluid">
  <app-add-product-template>Loading</app-add-product-template>
</div> Create below HTML template in add-product-template.component.html. This template is same as we have created initially in model driven forms.
<div class="card">
  <div class="card-body">
    <h4 class="card-title">ADD PRODUCT (Template Driven Form)</h4>
    <div class="row">

      <div class="col-md-6">
        <form novalidate>
          <div class="form-group">
            <label>Title</label>
            <input type="text" class="form-control">
          </div>
          <div class="form-group ">
            <label>Model Name</label>
            <input type="text" class="form-control">
          </div>
          <div class="form-group ">
            <label>Color</label>
            <input type="text" class="form-control">
          </div>
          <div class="form-group ">
            <label>Product Type</label>
            <select class="form-control">
              <option *ngFor="let p of productTypes" [value]="p">{{p}}</option>
            </select>
          </div>
          <div class="form-group ">
            <label>Brand</label>
            <input type="text" class="form-control">
          </div>
          <div class="form-group">
            <label>Price</label>
            <input type="text" class="form-control">
          </div>
          <button type="submit" class="btn btn-primary">Submit</button>
          <button class="btn btn-default">Reset</button>
        </form>
      </div>

    </div>
  </div>
</div>
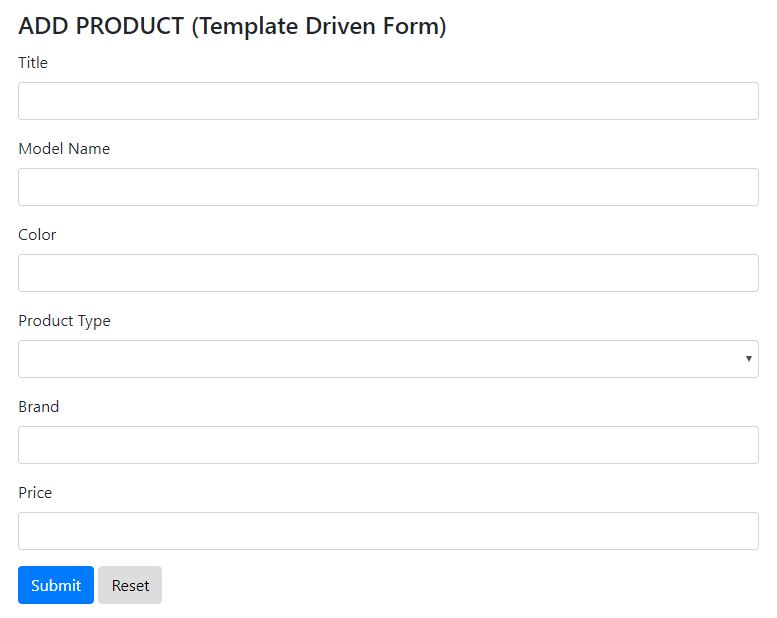
We want the select box to select the list of product types for the user to select. We can hardcode this list, but later on, whenever we need to update Product Type list we need to add extra tags.
Instead of this, we can make this dynamic by creating an array of productTypes inside the component. Using it in the template as shown below.
<select class="form-control">
     <option *ngFor="let p of productTypes" [value]="p">{{p}}</option>
</select>
This will look as below form.
For template driven forms we need to import FormsModule in the @NgModule .
Import FormsModule from @angular/forms library in app.module.ts and add it @NgModule.imports array. as shown below,
import { FormsModule } from '@angular/forms';
…

@NgModule({
 …
 imports: [
  …
        FormsModule
 ]
  …
})
export class AppModule { }
ngForm and ngModel are Angular Directives which are essential to creating Angular Template Driven Forms.
Lets start with ngForm first.
ngFormCreates a top-level FormGroup instance and binds it to a form to track aggregate form value and validation status.
NgForm directive has a selector which matches the HTML form tag.
<form #myForm="ngForm">...</form>
Here #myForm is the local template reference variable which refers to the ngForm directive.
One of the things the ngForm directive does is create a top level FormGroup
So that we can use #myForm variable to access the properties of Angular Form like value, valid, invalid and errors.
So just like model driven forms we can output that to screen simply with a pre tag and the json pipe, as shown below
<pre > {{myForm.value | json}} </pre> If we run this code this will give use blank { } object. This is because ngForm directive doesn’t automatically detect all the controls that exist inside the <form> tag it’s linked to.
We need to explicitly register each template control with the ngForm directive. To do so we need to do two things to each template form control:
- Add the
ngModeldirective - Add the name attribute
The NgModel directive creates the FormControl instance to manage the template form control and the name attribute tells the NgModel directive what key to store for that FormControl in the parent FormGroup, as shown below :
<div class="form-group">
            <label>Title</label>
            <input type="text" class="form-control" name="title" ngModel>
</div>
Now if you run an application you will get myForm.value as below :
{
  'title': ""
}
And once you change the title field, json will change, so title template control is linked.
The same way we need to link all other controls as shown below.
<div class="card">
  <div class="card-body">
    <h4 class="card-title">ADD PRODUCT (Template Driven Form)</h4>
    <div class="row">
      <div class="col-md-6">
        <form novalidate>
          <div class="form-group">
            <label>Title</label>
            <input type="text" class="form-control" name="title" ngModel>
          </div>
          <div class="form-group ">
            <label>Model Name</label>
            <input type="text" class="form-control" name="modelName" ngModel>
          </div>
          <div class="form-group ">
            <label>Color</label>
            <input type="text" class="form-control" name="color" ngModel>
          </div>
          <div class="form-group ">
            <label>Product Type</label>
            <select class="form-control" name="productType" ngModel>
              <option *ngFor="let p of productTypes" [value]="p">{{p}}</option>
            </select>
          </div>
          <div class="form-group ">
            <label>Brand</label>
            <input type="text" class="form-control" name="brand" ngModel>
          </div>
          <div class="form-group">
            <label>Price</label>
            <input type="text" class="form-control" name="price" ngModel>
          </div>
          <button type="submit" class="btn btn-primary">Submit</button>
          <button class="btn btn-default">Reset</button>
        </form>
      </div>
    </div>
  </div>
</div>
Once we link all controls, we will get below myForm.value, and as you change the input fields, myForm.value will also change.
{
  "title": "",
  "modelName": "",
  "color": "",
  "productType": "",
  "brand": "",
  "price": ""
}
Another way to work with template driven forms is using Two-way data binding.
We can use ngModel directive to setup two-way data binding between a template form control and a variable on our component.
So when the user changes the value in the template form control the value of the variable on the component automatically updates and when we change the variable on the component the template form control automatically updates.
To map template control using two-way data binding, first we need to create a variable inside component with which we will map the control and then use below syntax in template control tag.
[(ngModel)]="variable-name"
as shown below, I have created one title variable in TestComponent and then I have linked it with title template control using [(ngModel)].
export class TestComponent {
  title = 'Angular App';
}
<label>Title</label>
<input type="text" name="title" [(ngModel)]="title">
<h1>Title : {{title}}</h1>
The same way, we will create one product object of type Product Domain model inside the AddProductTemplateComponent. and link it with the HTML form Template control using [(ngModel)], as shown below.
import { Product } from './../models/product';
import { Component, OnInit } from '@angular/core';

@Component({
  selector: 'app-add-product-template',
  templateUrl: './add-product-template.component.html',
  styleUrls: ['./add-product-template.component.css']
})
export class AddProductTemplateComponent implements OnInit {

  product: Product = new Product();
  productTypes = ['Laptop', 'Mobile'];
  constructor() { }

  ngOnInit() {
  }

}
<div class="card">
  <div class="card-body">
    <h4 class="card-title">ADD PRODUCT (Template Driven Form)</h4>
    <div class="row">
      <div class="col-md-6">
        <form #myForm="ngForm" novalidate>
          <div class="form-group">
            <label>Title</label>
            <input type="text" class="form-control" name="title" [(ngModel)]="product.title" >
          </div>
          <div class="form-group ">
            <label>Model Name</label>
            <input type="text" class="form-control" name="modelName" [(ngModel)]="product.modelName">
          </div>
          <div class="form-group ">
            <label>Color</label>
            <input type="text" class="form-control" name="color" [(ngModel)]="product.color" >
          </div>
            <div class="form-group ">
              <label>Product Type</label>
              <select class="form-control" name="productType" [(ngModel)]="product.productType">
                <option *ngFor="let p of productTypes" [value]="p">{{p}}</option>
              </select>
            </div>
            <div class="form-group">
              <label>Brand</label>
              <input type="text" class="form-control" name="brand" [(ngModel)]="product.brand">
            </div>
            <div class="form-group">
              <label>Price</label>
              <input type="text" class="form-control" name="price" [(ngModel)]="product.price">
            </div>
            <button type="submit" class="btn btn-primary"" >Submit</button>
            <button class="btn btn-default">Reset</button>
        </form>
        </div>
        <div class="col-md-6">
          <label>
            <strong>myForm : JSON</strong>
          </label>
          <pre class="alert alert-dark">{{myForm.value | json}}</pre>
        </div>
      </div>
    </div>
</div> - Note
We need to initialize product object when we declare it otherwise when a component is loaded on screen it will throw below error.
- Note
The [(ngModel)] syntax is a combination of the syntax for input property binding [] and output event binding ()
The long form of writing the above would be:
<input name="title" [ngModel]="product.title" (ngModelChange)="product.title = $event" >
- Tip
We have discussed two way to work with Template driven forms. You can use any of the ways.
but when you will work with validation of template driven forms, Two Way Data Binding method is easy to use.
Form validation of Template Driven Form is same as we have discussed in Form Validators chapter for Model Driven Forms. But In Template Driven Forms we need not have use Validators class of @angular/forms.
We can directly specify HTML 5 validators inside the input tag.
For Example,
<input type="text" class="form-control" name="title" [(ngModel)]="product.title" required minlength="10">
The same way we will add validations for other template control.
As we have discussed in Form Validators, We use different Form Control State like valid, touched and dirty to display visual feedback on the screen. These are the properties of FormControl.
but in template driven forms we do not create a FormControl object inside the Component. So to access FormControl we can use either of below way.
1. Using .form property of ngForm
We can access the title FormControl of myForm using myForm.form.controls.title. using this object we can access the control state of title FormControl as shown below.
<div class="form-group">
            <label>Title</label>
            <input type="text" class="form-control" name="title" [(ngModel)]="product.title" required minlength="10">
            <div class="alert alert-info" role="alert">
              <strong>Valid ? </strong>{{myForm.form.controls.title?.valid}} <br>
              <strong>Invalid ? </strong>{{myForm.form.controls.title?.invalid}}<br>
              <strong>Touched ? </strong>{{myForm.form.controls.title?.touched}}<br>
              <strong>Untouched ? </strong>{{myForm.form.controls.title?.untouched}}<br>
              <strong>Dirty ? </strong>{{myForm.form.controls.title?.dirty}}<br>
              <strong>Pristine ? </strong>{{myForm.form.controls.title?.pristine}}<br>
            </div>
</div>
2. Using local template reference variable.
As you can see in the above code, to access control state properties of title control we need to go through myForm.form.controls.title.valid. Using ngModel directive we can make this shorter.
as shown below, we are creating a local reference to the title FormControl using ngModel directive.
<input type="text" class="form-control" name="title" [(ngModel)]="product.title" required minlength="10" #title="ngModel">
Now, we can access the control state of title using just title.valid, as shown below
<div class="form-group">
            <label>Title</label>
            <input type="text" class="form-control" name="title" [(ngModel)]="product.title" required minlength="10" #ngModel="title">
            <div class="alert alert-info" role="alert">
              <strong>Valid ? </strong>{{title.valid}} <br>
              <strong>Invalid ? </strong>{{title.invalid}}<br>
              <strong>Touched ? </strong>{{title.touched}}<br>
              <strong>Untouched ? </strong>{{title.untouched}}<br>
              <strong>Dirty ? </strong>{{title.dirty}}<br>
              <strong>Pristine ? </strong>{{title.pristine}}<br>
            </div>
</div>
Both the ways will give the same output as shown below.
Now we can show the Visual feedback same as we have seen in the Form Validators of Model Driven Forms, as shown below
<div class="form-group">
            <label>Title</label>
            <input type="text" class="form-control" name="title" [(ngModel)]="product.title" required minlength="10" #title="ngModel" [ngClass]="{'is-invalid': title?.errors && (title?.touched ||title?.dirty), 'is-valid':title?.valid}">
            <div class="invalid-feedback">
              <strong *ngIf="title?.errors?.required">Title is required</strong>
              <strong *ngIf="title?.errors?.minlength">
                Title length must be greated than {{title?.errors?.minlength.requiredLength}} character.
                 {{title?.errors?.minlength.requiredLength - title?.errors?.minlength.actualLength}} more character required.
              </strong>
            </div>

</div>

The same way we will add the validation for all other controls.
Refer Form Validators chapter for detail information about Angular Form Validation and Validation Styles.
As we have discussed in the model driven form, we can submit the form using ngSubmit directive or on the click event of the Submit button. You can use either way.
We will create one method inside the component. As shown below
import { ProductService } from './../service/product.service';
import { Product } from '../models/product';
...
@Component({
  selector: 'app-add-product-template',
  templateUrl: './add-product-template.component.html',
  styleUrls: ['./add-product-template.component.css']
})
export class AddProductTemplateComponent implements OnInit {
  ...
  product : Product = new Product();
  formSubmitted = false;
  ...
  constructor(private productService: ProductService) { }
  addProduct() {
    this.productService.addProduct(product);
    this.formSubmitted = true;
  }
  ...
}
We have used the ProductService to add a product to the server.
Note here, we have not passed the parameter as an argument, because product object is created in component and it is two way mapped to the template form. So we can directly use that object inside any component method.
formSubmitted is the flag we have used to show a message once it becomes true.
We will call this method on the click event of submit button, this button will be disabled until all the controls are valid, as shown below.
<button type="submit" class="btn btn-primary" (click)="addProduct()" [disabled]="myForm.invalid">Submit</button>
We can reset the form as the same way as in the model-driven form. As shown below,
<button class="btn btn-default" (click)="myForm.reset()">Reset</button>
Refer Form Submit chapter for detail information about Angular Form Validation and Validation Styles.
<div class="jumbotron jumbotron-fluid">
  <div class="container">
    <h1 class="display-3">Welcome to Electronic-Shop</h1>
    <p class="lead">THE ONLINE MEGASTORE</p>
    <hr class="my-2">
  </div>
</div>
<div class="container-fluid">
  <app-add-product-template>Loading</app-add-product-template>
</div>
<div class="card">
<div class="card-body">
<h4 class="card-title">ADD PRODUCT (Template Driven Form)</h4>
<div class="alert alert-info alert-dismissible " role="alert" *ngIf="formSubmitted">
<button type="button" class="close" data-dismiss="alert" aria-label="Close">
<span aria-hidden="true">×</span>
<span class="sr-only">Close</span>
</button>
<strong>Bingo !!! Form Submitted...</strong>
</div>
<div class="row">
<div class="col-md-6">
<form #myForm="ngForm" novalidate>
<div class="form-group">
<label>Title</label>
<input type="text" class="form-control" name="title" [(ngModel)]="product.title" required minlength="10" #title="ngModel"
[ngClass]="{'is-invalid': title?.errors && (title?.touched || title?.dirty),
'is-valid':title?.valid}">
<div class="invalid-feedback">
<strong *ngIf="title?.errors?.required">Title is required</strong>
<strong *ngIf="title?.errors?.minlength">
Title length must be greated than {{title?.errors?.minlength.requiredLength}} character. {{title?.errors?.minlength.requiredLength
- title?.errors?.minlength.actualLength}} more character required.
</strong>
</div>
</div>
<div class="form-group ">
<label>Model Name</label>
<input type="text" class="form-control" name="modelName" [(ngModel)]="ngModel">
</div>
<div class="form-group ">
<label>Color</label>
<input type="text" class="form-control" name="color" [(ngModel)]="product.color" pattern="[a-zA-Z]*" #color="ngModel"
[ngClass]="{'is-invalid': color.errors && (color.touched || color.dirty)}">
<div class="invalid-feedback">
<strong>Only Alphabets are allowed. </strong>
</div>
</div>
<div class="form-group ">
<label>Product Type</label>
<select class="form-control" name="productType" [(ngModel)]="product.productType" required #productType="ngModel"
[ngClass]="{'is-invalid': productType.errors && (productType.touched || productType.dirty), 'is-valid':productType.valid}">
<option *ngFor="let p of productTypes" [value]="p">{{p}}</option>
</select>
<div class="invalid-feedback">
<strong>Select Product Type.</strong>
</div>
</div>
<div class="form-group">
<label>Brand</label>
<input type="text" class="form-control" name="brand" [(ngModel)]="product.brand" #brand="ngModel" required [ngClass]="{'is-invalid': brand.errors && (brand.touched || brand.dirty), 'is-valid':brand.valid}">
<div class="invalid-feedback">
<strong>Brand Name is required.</strong>
</div>
</div>
<div class="form-group">
<label>Price</label>
<input type="text" class="form-control" name="price" [(ngModel)]="product.price" required min="0" #price="ngModel"
[ngClass]="{'is-invalid': price.errors && (price.touched || price.dirty), 'is-valid':price.valid}">
<div class="invalid-feedback">
<strong *ngIf="price.errors?.required"> Price is required</strong>
<strong *ngIf="price.errors?.min"> Price should be greated than zero.</strong>
</div>
</div>
<button type="submit" class="btn btn-primary" (click)="addProduct()" [disabled]="myForm.invalid">Submit</button>
<button class="btn btn-default" (click)="myForm.reset()">Reset</button>
</form>
</div>
<div class="col-md-6">
<label>
<strong>myForm : JSON</strong>
</label>
<pre class="alert alert-dark">{{myForm.value | json}}</pre>
</div>
</div>
</div>
</div>
import { ProductService } from './../service/product.service';
import { Product } from './../models/product';
import { Component, OnInit } from '@angular/core';

@Component({
  selector: 'app-add-product-template',
  templateUrl: './add-product-template.component.html',
  styleUrls: ['./add-product-template.component.css']
})
export class AddProductTemplateComponent implements OnInit {

  product: Product = new Product();
  formSubmitted = false;
  productTypes = ['Laptop', 'Mobile' ];
  constructor(public productService: ProductService) { }

  ngOnInit() {
  }

  addProduct() {
    this.productService.addProduct(this.product);
    this.formSubmitted = true;
  }

}
import { MockData } from './../mock-data/mock-product-data';
import { Injectable } from '@angular/core';
import { Product } from '../models/product';
@Injectable()
export class ProductService {
  products: Product[] = [];
  constructor() {
    this.products = MockData.Products;
  }
  getProducts(): Product[] {
    return this.products;
  }
  addProduct(product: Product) {
    this.products.push(product);
  }
  removeProduct(product: Product) {
    let index = this.products.indexOf(product);
    if (index !== -1) {
      this.products.splice(index, 1);
    }
  }
} 
In this chapter, we have seen
- How template driven forms differ with model-driven forms ?
- Form Directive: ngForm and ngModel
- Use of Two-way data binding.
- Template Driven Form Validation
- Form Submit and Form Reset in Template Driven Forms.